Learn how to propagate Aloe Vera with this simple, step-by-step guide. Discover effective methods for growing new Aloe plants from offsets and leaves. Perfect for beginners and plant enthusiasts alike, this guide covers everything you need to know about Aloe Vera care, including ideal conditions and tips for healthy growth. Start expanding your indoor garden with this low-maintenance succulent and enjoy the benefits of Aloe Vera right at home!
Best Time to Propagate Aloe Vera
Ideal Seasons for Propagation
Aloe vera is a resilient plant, but timing can significantly boost your propagation success. Spring and early summer are the best times to propagate aloe vera. During these seasons, the plant is in its active growth phase, which means it can recover and establish roots more quickly. Avoid propagating in the colder months as the plant’s growth slows down, making it harder for new roots to develop.
Environmental Conditions for Success
Getting the environment right is crucial when propagating aloe vera. Here’s what you need to consider:
- Temperature: Aim for a warm environment, ideally between 70°F (21°C) and 85°F (29°C). Aloe vera thrives in warmth and struggles in cold conditions.
- Light: Provide plenty of indirect sunlight. Direct sunlight can be too harsh, especially for young plants. If indoors, a bright windowsill is perfect.
- Humidity: Keep it low to moderate. High humidity can lead to rot, which is the nemesis of aloe propagation.
Tools and Materials Needed
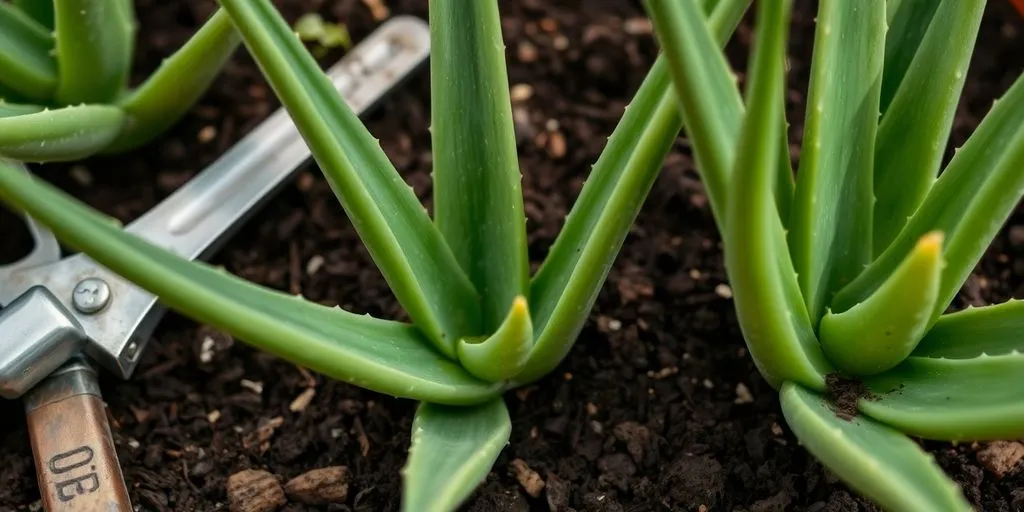
When you’re ready to propagate your aloe vera, having the right tools and materials on hand can make the process smoother and more successful. Here’s a list of essentials you’ll need:
- Sharp Knife or Pruners: To cleanly cut leaves or separate pups from the mother plant, a sharp knife or pair of pruners is essential. Dull tools can cause damage to the plant tissue, leading to rot or infection.
- Potting Soil: Use a well-draining potting mix, ideally one designed for cacti and succulents. Aloe vera doesn’t like to sit in wet soil, so ensuring good drainage is crucial.
- Pots or Containers: Choose containers with drainage holes to prevent water from accumulating at the bottom. Terracotta pots are a great choice as they allow moisture to evaporate, helping to keep the soil dry.
- Rooting Hormone (Optional): While not necessary, a rooting hormone can encourage faster root development, especially when propagating from leaves or cuttings.
- Gloves: Aloe vera has a sticky sap that can be irritating to some people’s skin. Wearing gloves can help protect your hands while handling the plant.
Methods of Aloe Vera Propagation
Propagation From Leaf
Propagating aloe vera from a leaf is a common method, though it requires patience. Start by selecting a healthy, mature leaf from the outer part of the plant. Using a clean, sharp knife, make a straight cut near the base. Allow the cut end to dry and form a callus over a few days. Once callused, plant the leaf in a well-draining potting mix. Water sparingly and place it in indirect sunlight. This method is simple but may take time for the plant to develop roots.
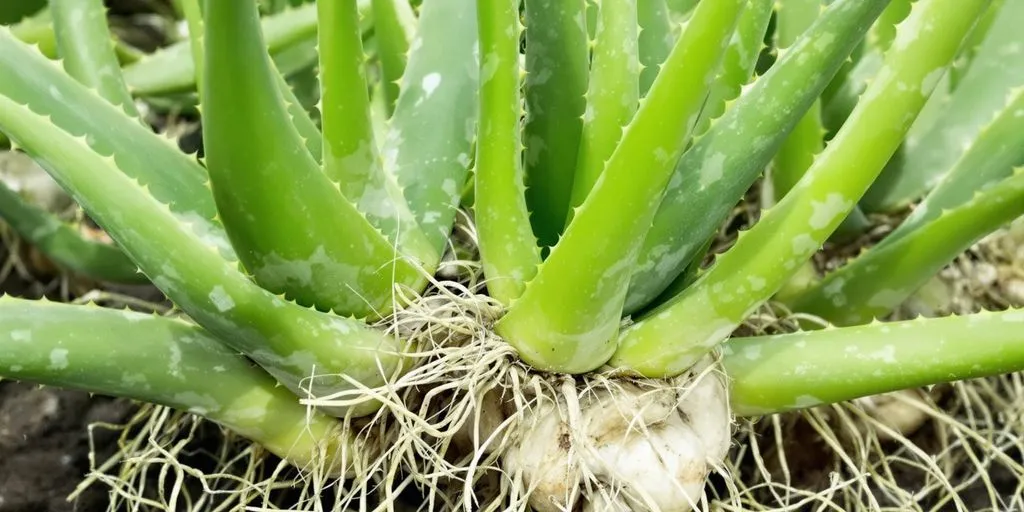
Propagating Pups
Aloe vera naturally produces offsets, or “pups,” which are small plants that grow alongside the parent. To propagate using pups, gently remove them from the base, ensuring they have some roots attached. Let them dry for a day or two to form a callus. Plant each pup in its own pot with well-draining soil. Place in bright, indirect sunlight and water lightly. This method is straightforward and usually has a high success rate.
Propagating from Cuttings
Cuttings can also be used to propagate aloe vera, although it’s not as common. Cut a healthy leaf into sections, ensuring each piece has a growth node. Allow the cuttings to callus over a few days. Plant them in a suitable potting mix, ensuring good drainage. Water after a few days and allow the soil to dry out between waterings. This method requires patience as the cuttings take time to root.
Propagating From Seeds
Growing aloe vera from seeds is less common due to the time and care required. Sow seeds in a well-draining potting mix and place them in a warm, bright area, avoiding direct sunlight. Keep the soil moist but not waterlogged. Germination can take several weeks to months, and the plants will need time to mature. This method allows for experimentation and discovering unique plant variations.
How to Propagate Aloe Vera From Leaf

Step by Step Guide
Propagating aloe vera from a leaf isn’t as straightforward as other methods, but with patience, you can do it. Here’s how:
- Choose a Healthy Leaf: Start by selecting a robust, mature leaf from the outer part of the plant. Avoid leaves that are damaged or discolored.
- Make a Clean Cut: Use a sharp, sterile knife or scissors to cut the leaf close to the base. Ensure the cut is clean to prevent infection.
- Allow to Callus: Let the cut end of the leaf dry out and form a callus. This usually takes a couple of days. The callus prevents the leaf from rotting when planted.
- Prepare the Potting Mix: Use a well-draining potting mix, ideally one suited for succulents. Fill a pot with this mix, leaving enough room to plant the leaf.
- Plant the Leaf: Once the leaf has callused, place the cut end into the soil. Bury it just enough to support the leaf upright.
- Find the Right Spot: Position the pot in a location that gets indirect sunlight. Direct sunlight can be too harsh and may dry out the leaf too quickly.
- Water Sparingly: Water the soil lightly, ensuring it stays moist but not soggy. Overwatering can cause the leaf to rot.
Success Rate
The success rate of propagating aloe vera from a leaf is (Relatively Low) compared to other methods like using pups. However, it’s still worth a try if you’re curious. Patience is key, as it can take several weeks to see any signs of growth.
Challenges
- Rooting Difficulty: Aloe leaves are less likely to root compared to other propagation methods.
- Rot Risk: There’s a higher risk of the leaf rotting before it roots, especially if the environment is too humid or the soil is too wet.
- Time-Consuming: This method takes longer to see results, requiring patience and careful monitoring of conditions.
How to Propagate Aloe Vera Pups
Step by Step Guide
Propagating aloe vera pups is one of the simplest and most effective ways to grow new plants. Here’s how you can do it:
- Wait for the Right Time: Ensure the pups are ready to be separated. They should be at least 3-4 inches tall and have a few sets of leaves. This ensures they have developed enough to survive on their own.
- Remove the Parent Plant: Carefully take the parent aloe out of its pot. If it’s stuck, gently run a dull knife around the pot’s edge to loosen it.
- Separate the Pups: Once the plant is out, gently tease the pups away from the parent. If the pups have roots, carefully free them with your fingers. For those without roots, use a clean, sharp knife to cut them away, ensuring you leave as much stem as possible.
- Let Them Callus: Leave the separated pups in a cool, dry place for 24-48 hours to allow the cut ends to callus. This step is crucial to prevent rotting when they are planted.
- Plant the Pups: Choose a small pot with a drainage hole. Use a well-draining succulent mix, and plant the pup so its base is at soil level. Firm the soil around it and add pebbles on top to stabilize it.
- Water and Care: Initially, wait 7-10 days before watering to prevent rot. Afterward, water every 5-10 days during the growing season, adjusting for heat and humidity.
Success Rate
Aloe vera pups have a (High Success Rate) when propagated properly. The key is ensuring the pups are mature enough and have a strong root system before separation.
Challenges
- Root Damage: Be careful not to damage the roots when separating the pups from the parent plant.
- Rotting: Ensure the pups are adequately callused before planting to prevent rot.
- Overwatering: Avoid watering too soon after planting to reduce the risk of rot. Always use a well-draining soil mix.
How to Propagate Aloe Vera from Cuttings
Step by Step Guide
Propagating aloe vera from cuttings is a simple yet rewarding process. Here’s how to do it:
- Select a Healthy Leaf: Choose a mature, healthy leaf from the base of the aloe plant. The leaf should be thick and free from blemishes.
- Make a Clean Cut: Use a sharp, clean knife or scissors to cut the leaf close to the stem. It’s important to ensure the cut is clean to prevent infection.
- Allow the Leaf to Callus: Place the cut leaf in a dry, warm spot out of direct sunlight. Let it sit for a few days until the cut end forms a callus. This step is crucial to prevent rotting when the leaf is planted.
- Prepare the Potting Mix: Use a well-draining potting mix, ideally one designed for succulents. You can mix regular potting soil with sand or perlite to improve drainage.
- Plant the Leaf: Once the cut end has callused, plant the leaf in the potting mix with the cut side down. Ensure it’s stable and upright.
- Water Sparingly: Water the plant lightly after a few days. Aloe vera doesn’t like to be waterlogged, so allow the soil to dry out between waterings.
- Provide Indirect Sunlight: Place the pot in a location where it will receive indirect sunlight. Direct sun can be too harsh and may dry out the cutting.
Success Rate
The success rate of propagating aloe vera from cuttings can vary. While this method is beginner-friendly, it requires patience as the leaf may take several weeks to root. Success isn’t guaranteed, but with the right conditions, many gardeners find it rewarding.
Challenges
One of the main challenges is ensuring the leaf doesn’t rot before it roots. This is why allowing the cut end to callus is essential. Additionally, overwatering can lead to root rot, so it’s important to water sparingly and ensure the soil is well-draining.
How to Propagate Aloe Vera From Seeds

Step by Step Guide
Propagating aloe vera from seeds is a bit of a waiting game, but it can be rewarding. Here’s how you can do it:
- Collect Seeds: Start by sourcing mature seeds. You can gather them from an existing aloe plant if it’s old enough to flower, or buy them from a reputable supplier.
- Prepare the Soil: Use a well-draining potting mix. A succulent mix works well. Ensure it’s slightly moistened before planting.
- Sow the Seeds: Gently press the seeds into the surface of the soil. They shouldn’t be buried deep; a light covering is sufficient.
- Provide Light and Water: Place the pots in a bright area, but avoid direct sunlight. Keep the soil consistently moist, but not soggy.
- Germination: Be patient. It can take several weeks for the seeds to sprout. Once they do, reduce watering to every 10-14 days.
- Transplanting: When seedlings are a few inches tall, move them to individual pots. Continue with regular succulent care.
Success Rate
Growing aloe from seeds has a lower success rate compared to other methods like pups or cuttings. Patience is key here, as the process is slow and requires consistent care.
Challenges
- Slow Growth: Aloe seeds take time to germinate and grow. Don’t be discouraged if you don’t see immediate results.
- Moisture Management: Overwatering can lead to rot, while underwatering can hinder growth. Finding the right balance is crucial.
- Light Conditions: Ensure they get enough light without being scorched by direct sun, which can be tricky to manage indoors.
Tips for Successful Propagation
Propagating aloe vera can be a rewarding experience, but getting it right requires a bit of know-how. Here are some essential tips to ensure your aloe propagation journey is a success:
- Choose the Right Plant: Start with a healthy, mature aloe plant. The parent plant should be free from pests and diseases, as these can affect the new plants.
- Use the Correct Tools: Always use clean, sharp tools for cutting. This minimizes the risk of infection and ensures a clean cut, which is crucial for successful rooting.
- Mind the Timing: Propagation is best done during the growing season, typically in spring or early summer. This is when the plant’s natural growth hormones are most active.
- Provide Proper Light: Aloe vera loves bright, indirect sunlight. Too much direct sunlight can scorch the leaves, while too little can hinder growth.
- Water Wisely: Overwatering is a common mistake. Allow the soil to dry out between waterings to prevent root rot. Remember, aloe is a succulent and stores water in its leaves.
- Be Patient: Rooting can take several weeks. Don’t be discouraged if you don’t see immediate results. Aloe vera takes its time to establish roots.
- Use the Right Soil: A well-draining soil mix is essential. Consider using a cactus or succulent mix, which provides the drainage aloe needs.
- Monitor for Pests: Keep an eye out for pests like aphids or mealybugs. Early detection and treatment can prevent them from spreading to your new plants.
Common Challenges and Troubleshooting Tips

When you’re trying to propagate aloe vera, things don’t always go as planned. Here are some common hiccups you might face and ways to fix them.
Rotting Leaves
One of the biggest challenges is dealing with rotting leaves. This usually happens if there’s too much moisture. Aloe vera doesn’t like sitting in wet soil, so make sure your pot has good drainage. If you notice leaves getting mushy, cut back on watering and let the soil dry out completely before the next round.
Root Rot
Similar to leaf rot, root rot is a result of overwatering. If you suspect root rot, take the plant out of its pot and check the roots. Healthy roots are firm and white, while rotten ones are brown and mushy. Trim off the bad parts and repot the plant in fresh, dry soil.
Slow Growth
If your aloe isn’t growing as fast as you’d like, it might be due to a lack of sunlight. Aloe vera needs plenty of bright, indirect light. Move your plant to a sunnier spot, but avoid direct sunlight, which can scorch the leaves.
Pests
Aloe plants can sometimes attract pests like aphids or mealybugs. If you spot these little critters, wipe them off with a damp cloth or use a mixture of water and mild soap to spray them away. Regularly checking your plants can help catch these pests early.
Yellowing Leaves
Yellow leaves can be a sign of too much water or not enough light. Adjust your watering schedule and ensure the plant gets enough light. If the problem persists, consider the possibility of nutrient deficiency and use a balanced fertilizer sparingly.
Propagation Failure
Sometimes, despite your best efforts, propagation just doesn’t work. This can be due to factors like poor cutting quality or unsuitable environmental conditions. Make sure you’re using healthy parts of the plant and that your growing environment is warm and humid enough for new growth.
Soil and Environmental Conditions
When it comes to propagating aloe vera, choosing the right soil and environment is key. Aloe vera thrives in conditions that mimic its natural habitat, which is typically dry, warm, and sunny. Here’s how you can create the perfect setup:
Optimal Soil Composition
- Cactus or Succulent Mix: Aloe vera does best in a well-draining soil mix. A cactus or succulent mix is ideal because it prevents water from pooling around the roots, which can lead to rot.
- Soil Amendments: If you can’t find a succulent mix, you can make your own by mixing regular potting soil with sand or perlite. Aim for a ratio that allows for quick drainage.
Environmental Factors
- Sunlight: Aloe vera loves sunlight. Place your plant in a spot where it can receive at least six hours of bright, indirect sunlight each day. Direct sunlight can scorch the leaves, so a balance is essential.
- Temperature: Aloe vera prefers temperatures between 55°F and 80°F. It’s not frost-tolerant, so if you live in a cooler climate, consider bringing it indoors during the winter months.
- Humidity: These plants are accustomed to dry conditions. High humidity can encourage mold and rot, so keep them in a dry environment.
Watering Needs
- Less is More: Overwatering is a common mistake. Water your aloe vera only when the top inch of soil feels dry. During the winter, reduce watering as the plant’s growth slows.
Importance and Benefits of Propagating Aloe Vera
Propagating Aloe Vera is not only economical but also sustainable. By propagating, you’re ensuring you always have a supply of this versatile plant, known for its medicinal properties. Aloe Vera gel is great for soothing burns and skin irritations. Plus, the plant itself is a natural air purifier, making your home healthier. Growing more Aloe Vera means you can enjoy these benefits in multiple rooms or even share them with others. It’s a simple way to contribute to a greener planet while enjoying the therapeutic process of gardening.
Frequently Asked Questions
What is the easiest way to propagate aloe vera?
The simplest method is by using pups or offsets. These are small plants that grow next to the parent and can be potted separately once they have roots.
How long does it take for aloe vera to root?
It usually takes about 4 to 6 weeks for new roots to start forming, but this can vary depending on the method used.
Can I grow aloe vera from a leaf cutting?
Yes, you can grow aloe vera from a leaf cutting, but it’s less reliable than using pups. The leaf needs to dry and form a callus before planting.
What kind of soil is best for aloe vera propagation?
Aloe vera does best in well-draining soil. A mix of sand, perlite, and regular potting soil works well.
How often should I water newly propagated aloe vera?
Water sparingly. Let the soil dry out completely between waterings to prevent root rot.
Can aloe vera grow in water?
Aloe vera is not suited for growing in water. It prefers dry conditions and well-draining soil.
What light conditions are ideal for aloe vera?
Aloe vera thrives in bright, indirect sunlight. Direct sun can be too harsh and may cause the leaves to brown.
Why is my aloe vera turning brown after propagation?
Browning can be caused by overwatering, too much direct sunlight, or poor soil drainage. Adjust these conditions to help your plant recover.