Looking to grow the most delicious, homegrown potatoes that put store-bought ones to shame? The “trick” is understanding the perfect growing conditions these underground treasures need to thrive. This method helped me transform my modest garden patch into a potato-producing powerhouse, harvesting over 150 pounds of buttery-smooth potatoes from just a 10×10 space. In this guide, I’ll reveal the exact steps that turned my average backyard into a potato paradise, saving me hundreds on groceries while providing my family with fresh spuds all year round.
Choosing the Right Potato Varieties

This is the first step for success, Knowing the right varieties to grow
Without the right variety, chances of growth is zero.
Here are the best main types of potatoes categorized by their maturity that has a higher chance of success:
- Early Varieties (Mature in 70-90 days)
- Examples: ‘Red Bliss’, ‘Yukon Gold’
- Mid-Season Varieties (Mature in 90-110 days)
- Examples: ‘Kennebec’, ‘Norland’
- Late Varieties (Take more than 110 days to mature)
- Examples: ‘Russet Burbank’, ‘Purple Majesty’
Seed Potatoes
It’s essential to use certified seed potatoes to avoid diseases. You can purchase healthy seed potatoes from local garden centers or online.
Preparing the Soil for Potatoes
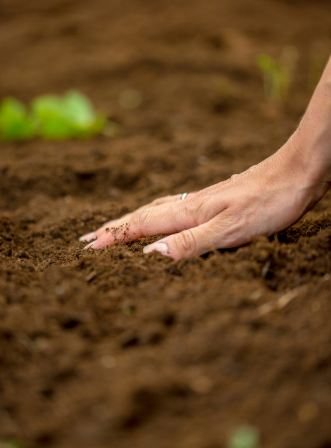
Second step soil, you can have the best variety in the world but without a good soil you’re still going to fail because that’s what they need to thrive in.
Here’s how to prepare your soil:
- Choose a Location: Look for a sunny spot that receives at least 6 hours of sunlight per day.
- Conduct a Soil Test: Check the pH and nutrient levels. Potatoes prefer slightly acidic soil (pH 5.0-6.0).
- Amend the Soil: Add organic matter, such as compost or well-rotted manure, to improve soil structure and fertility.
Soil Requirements
| Soil Type | Characteristics |
|---|---|
| Sandy Soil | Drains well, warms quickly, may require more water. |
| Loamy Soil | Ideal for growing potatoes; retains moisture and drains well. |
| Clay Soil | Heavy and dense; can cause rot if not amended. |
How to Grow Potatoes Step-by-Step
Step 1: Chitting Potatoes
Chitting is the process of encouraging seed potatoes to sprout before planting, which can lead to an earlier harvest.
- How to Chit Potatoes: Place seed potatoes in a light, cool, and dry place (about 60-70°F) for 2-4 weeks until they develop short, sturdy sprouts.
Step 2: Preparing Your Planting Area
- Clear the Area: Remove any weeds, rocks, or debris from the planting site.
- Loosen the Soil: Use a shovel or tiller to break up the soil to a depth of at least 12 inches.
- Mix in Organic Matter: Incorporate compost or well-rotted manure into the soil to enhance fertility.
Step 3: Planting Potatoes
- Timing: Plant potatoes 2-4 weeks before the last frost date in your area. Generally, early spring is the best time.
- Spacing: Space seed potatoes about 12 inches apart, with rows spaced 2-3 feet apart.
- Depth: Dig holes about 4-6 inches deep and place the seed potatoes with the sprouts facing upwards. Cover them with soil.
Step 4: Watering and Fertilizing
Watering
- Initial Watering: After planting, water the potatoes thoroughly.
- Regular Schedule: Keep the soil consistently moist but not waterlogged. Water deeply once a week, increasing frequency during dry spells.
Fertilizing
- Initial Fertilization: Apply a balanced fertilizer (e.g., 10-10-10) at planting time.
- Mid-Season Fertilization: Apply a second dose of fertilizer 4-6 weeks after planting.
Step 5: Hilling Potatoes
Hilling is the process of adding soil around the base of potato plants as they grow. This helps to prevent greening and encourages tuber development.
- When to Hill: Hill potatoes when they reach about 6 inches tall.
- How to Hill: Use a hoe or shovel to mound soil around the base of the plants. You may need to repeat this process several times during the growing season.
Step 6: Monitoring Growth
Regularly check your potato plants for any signs of pests or diseases. Make sure they receive adequate water and nutrients throughout their growth.
- Signs of Healthy Growth: Look for lush green foliage and robust stems.
- Common Issues: Watch for yellowing leaves, wilting, or pests like aphids or Colorado potato beetles.
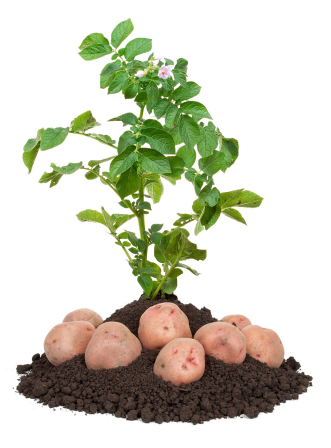
Step 7: Harvesting Potatoes
Knowing when and how to harvest potatoes is crucial for maximizing yield.
- Timing: Harvest early potatoes when the plants flower, and late varieties when the foliage turns yellow and dies back.
- Harvesting Technique: Use a garden fork to gently lift potatoes, being careful not to damage them.
How Long Do Potatoes Take to Grow?
The time it takes for potatoes to grow depends on the variety:
- Early Varieties: 70-90 days
- Mid-Season Varieties: 90-110 days
- Late Varieties: 110+ days
General Growth Timeline
| Stage | Duration |
|---|---|
| Chitting | 2-4 weeks |
| Planting | Early Spring |
| Germination | 2-3 weeks |
| Tuber Formation | 4-6 weeks |
| Harvesting | Late Summer to Early Fall |
Growing Potatoes Without Seeds
You can grow potatoes without using traditional seed potatoes by utilizing store-bought potatoes. Here’s how:
- Choose Sprouted Potatoes: Select organic potatoes that have sprouted eyes.
- Cut and Cure: Cut them into pieces with at least one eye per piece. Allow the cut pieces to dry and cure for a few days.
- Plant as Usual: Plant the pieces in the ground following the same guidelines as with seed potatoes.
Growing Potatoes from Potatoes
Growing potatoes from potatoes is an effective and simple method. Here’s how:
- Select Healthy Potatoes: Choose potatoes with several eyes.
- Cut and Cure: Cut them into chunks with at least one eye per piece and let them cure for a few days.
- Plant: Follow the planting instructions as detailed above.
Growing Potatoes in Different Containers

For those with limited space, growing potatoes in containers can be a great alternative. Here’s how to do it in various setups:
How to Grow Potatoes in a Container
- Choose a Container: Select a large pot or container with drainage holes. A 5-gallon bucket works well.
- Add Soil: Fill the container with a mix of soil and compost, leaving about 4 inches from the top.
- Plant: Plant seed potatoes in the soil, covering them with an additional layer of soil.
How to Grow Potatoes in Water
- Choose Potatoes: Select small, sprouted potatoes.
- Submerge: Place them in a container of water, ensuring the bottom half is submerged.
- Wait for Roots: Keep in a sunny location, changing the water regularly until roots develop.
How to Grow Potatoes in a Bag
- Select a Potato Bag: Use a breathable grow bag specifically designed for potatoes.
- Add Soil: Fill the bag with a mix of soil and compost.
- Plant: Plant seed potatoes as you would in the ground, covering them with soil.
How to Grow Potatoes in a Bucket
- Choose a Bucket: Use a 5-gallon bucket with drainage holes.
- Fill with Soil: Add a mix of soil and compost, leaving room for hilling.
- Plant: Follow the planting process, adding soil as the plants grow.
How Deep to Plant Potatoes

The depth at which you plant potatoes is essential for their growth:
- Standard Planting Depth: 4-6 inches deep for most methods.
- Container Planting: Ensure at least 10-12 inches of soil for adequate tuber development.
Secrets to Growing Potatoes
Here are some insider tips to boost your potato-growing success:
- Crop Rotation: Avoid planting potatoes in the same spot for consecutive years to reduce disease risks.
- Adequate Drainage: Ensure that your soil drains well to prevent tuber rot.
- Weed Control: Regularly remove weeds that compete for nutrients and water.
How to Grow Potato Sprouts
Growing potato sprouts can lead to healthy seed potatoes:
- Select Potatoes: Use small, healthy potatoes with visible eyes.
- Place in Light: Put them in a well-lit area to encourage sprouting.
- Moisture: Lightly mist them to maintain moisture but avoid soaking.
Common Problems and Solutions
Pests
- Colorado Potato Beetles: Handpick or use insecticidal soap to manage infestations.
- Aphids: Introduce beneficial insects or use neem oil to control populations.
Diseases
- Blight: Ensure good air circulation and avoid overhead watering to prevent blight.
- Scab: Prevent scab by planting in well-drained, moist soil.
Nutrient Deficiency
- Yellow Leaves: Often indicate nitrogen deficiency; apply a balanced fertilizer.
- Purple Leaves: Can signal phosphorus deficiency; consider adding bone meal.
Storing Potatoes
Proper storage can extend the life of your potatoes:
- Cure Potatoes: Allow harvested potatoes to cure in a cool, dark place for a few days.
- Store: Place them in a cool, dark, and well-ventilated area. Avoid sunlight and moisture.
- Check Regularly: Inspect stored potatoes for any signs of spoilage.