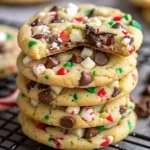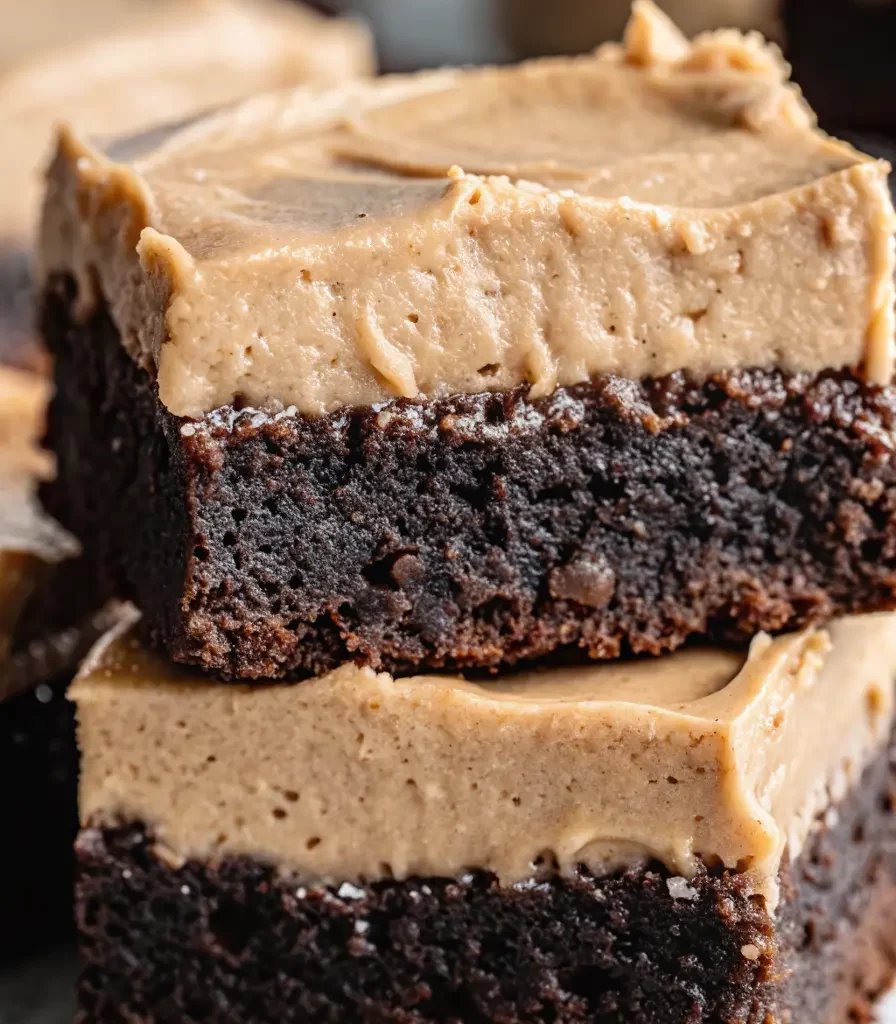
➡️Get ready for frosted coffee brownies that’ll make your kitchen smell like a fancy café! These fudgy squares pack a serious coffee punch with their mocha brownie base and creamy coffee frosting that’s honestly addictive. Let me walk you through making these incredible treats that disappear way too fast.
What Makes This Recipe Special ✨
This isn’t your average brownie recipe – it’s what happens when chocolate and coffee have a delicious love affair 😍. The combination creates depth that regular brownies just can’t match.
✅Rich, Complex Flavors 🍲
The coffee doesn’t overpower; it amplifies the chocolate intensity in ways that’ll surprise you. Actually, I used to think coffee in brownies was weird until I tried this combo. Now I can’t make them any other way!
✅Simple Ingredients, Big Results 🧄
Everything you need is probably in your pantry right now (well, maybe grab some instant coffee). The magic happens when these basic ingredients transform into something restaurant-worthy.
✅Family-Approved Winner 👨👩👧👦
Even the kids who claim they don’t like coffee gobble these up. The frosting balances everything perfectly – sweet enough for the sugar lovers, sophisticated enough for the adults.
Recipe Yield 🎯
Makes: 16 generous squares or 24 smaller pieces
Servings: 8-12 people (depends on portion control, which… good luck with that)
What You’ll Need 📝
For the Brownies:
- 1/2 cup all-purpose flour
- 1/3 cup unsweetened cocoa powder (Dutch-processed works amazing here)
- 1 stick (8 tablespoons) unsalted butter
- 1 cup granulated sugar
- 2 large eggs, room temperature
- 1 teaspoon vanilla extract
- 2 teaspoons coffee extract OR 1 tablespoon instant coffee dissolved in 1 tablespoon hot water
- 1/4 teaspoon baking powder
- 1/4 teaspoon salt
- 1/2 cup semi-sweet chocolate chips (optional but recommended)
For the Coffee Frosting:
- 1/3 cup (5 1/3 tablespoons) unsalted butter, softened
- 2 cups powdered sugar, sifted
- 1 1/2 teaspoons instant coffee granules
- 2-4 tablespoons heavy whipping cream (start with 2, add more as needed)
- 1/2 teaspoon vanilla extract
- Pinch of salt
Getting Ready 🏃♀️
Prep: 15 minutes
Cooling: 45 minutes (I know, the waiting is torture)
How Long to Cook 🕐
Bake time: 22-25 minutes
Total time: About 1 hour 20 minutes including cooling
Step-by-Step Instructions 👩🍳
Get Everything Ready 📋
Start by preheating your oven to 350°F (175°C). Line an 8×8 inch baking pan with parchment paper, leaving some overhang for easy removal. Trust me on this – trying to get these out without parchment is asking for trouble. Lightly grease the parchment with butter or cooking spray.
In a medium bowl, whisk together the flour, cocoa powder, baking powder, and salt. Set this aside. If you’re using instant coffee instead of extract, dissolve it in hot water now and let it cool slightly.
Create the Foundation 🏗️
Melt the butter in a large microwave-safe bowl (30-second intervals work best). Once melted, whisk in the sugar until well combined – it’ll look grainy, and that’s perfect. Let this cool for about 2 minutes so you don’t scramble the eggs.
Beat in the eggs one at a time, mixing well after each addition. The mixture should look glossy and smooth. Add the vanilla and coffee extract (or your dissolved instant coffee). Here’s where the magic starts – that coffee aroma hitting you? That’s flavor building right there!
Bring It Together 🤝
Gently fold the dry ingredients into the wet mixture using a spatula. Don’t overmix – honestly, I stop as soon as I can’t see flour anymore. If you’re adding chocolate chips (and why wouldn’t you?), fold them in now.
Pour the batter into your prepared pan and spread it evenly. Give the pan a gentle tap on the counter to release any air bubbles. Into the oven it goes!
The Baking Phase 🔥
Bake for 22-25 minutes. You want a toothpick inserted in the center to come out with just a few moist crumbs – not wet batter, but not completely clean either. Actually, I usually pull mine at 23 minutes because slightly underbaked brownies are fudgier (and that’s never a bad thing).
Remove from the oven and let them cool completely in the pan. I mean it – completely! If you frost warm brownies, you’ll have a melty mess. Though honestly, that still tastes amazing, just messier to serve 😅.
Making the Coffee Frosting ✨
While the brownies cool, make the frosting. Beat the softened butter until light and fluffy (about 2 minutes with an electric mixer). Dissolve the instant coffee in 2 tablespoons of cream.
Gradually add the powdered sugar to the butter, beating on low speed initially to avoid a sugar cloud in your kitchen. Pour in the coffee-cream mixture and vanilla. Beat on high for 2-3 minutes until the frosting is fluffy and spreadable. If it’s too thick, add more cream, one tablespoon at a time. Too thin? Pop it in the fridge for 10 minutes.
Finishing Touches ✨
Once the brownies are completely cool, lift them out using the parchment overhang. Spread the frosting evenly over the top – I like using an offset spatula, but a regular butter knife works fine.
For a professional look, use a fork to create swirl patterns in the frosting. Or don’t – rustic is totally in right now! Cut into squares with a sharp knife, wiping it clean between cuts for neat edges.
Kitchen Equipment 🏠
- 8×8 inch baking pan (9×9 works but reduces baking time by 2-3 minutes)
- Electric mixer (hand or stand)
- Mixing bowls
- Measuring cups and spoons
- Wire cooling rack (optional but helpful)
- Offset spatula for frosting (regular spatula works too)
Flavor Journey 🎢
The Taste Experience 😋
That first bite? It’s like your favorite coffee shop brownie and tiramisu had a baby. The brownie base is intensely chocolatey with subtle coffee undertones that don’t scream “COFFEE!” but rather whisper it seductively. The frosting adds creamy sweetness with a more pronounced coffee kick that balances everything perfectly.
Balancing the Flavors ⚖️
If you’re sensitive to coffee flavor, reduce the instant coffee in the frosting to 1 teaspoon. Want more intensity? Add an extra half teaspoon to both the brownies and frosting. The beauty here is customization – make them as coffee-forward or chocolate-dominant as you like!
Important Allergen Notes 📋
Common Allergens 🚨
Contains: Gluten (flour), dairy (butter, cream), eggs
May contain: Nuts if using chocolate chips (check labels)
Safe Substitutions 🔄
For gluten-free, use 1:1 gluten-free flour blend. For dairy-free, substitute vegan butter and use coconut cream for the frosting. Egg replacement gets tricky with brownies, but 2 flax eggs might work (haven’t tested this myself though).
Nutritional Breakdown 📋
Per brownie (1/16 of recipe): Approximately 220 calories, 10g fat, 32g carbs, 2g protein. Yeah, they’re not health food, but sometimes you need a proper treat!
Diet-Friendly Modifications 🔧
Making It Work ⚙️
For lower sugar, you could reduce the granulated sugar to 3/4 cup, though it affects the fudgy texture slightly. Keto folks – I’ve seen recipes using almond flour and erythritol, but that’s basically a different recipe entirely. For vegan versions, several swaps are needed – definitely doable but expect different results.
Creative Twists 🌪️
Ingredient Swaps 🔄
Swap the coffee extract for espresso powder for deeper flavor. Try brown butter instead of regular for nuttiness. Add cinnamon (1/2 teaspoon) for a Mexican hot chocolate vibe. Toss in white chocolate chips instead of semi-sweet for contrast.
Method Variations ⚙️
Make them in a muffin tin for individual brownie bites (bake 15-18 minutes). Use a 9×13 pan for thinner brownies – just watch the baking time! Create a swirl effect by dropping dollops of frosting on warm brownies and swirling with a knife.
What to Serve With This 🍽️
Perfect Partners 👫
These pair beautifully with vanilla ice cream (the temperature contrast is everything). A dollop of whipped cream lightens things up. Fresh berries cut through the richness nicely.
Drink Suggestions 🍻
Obviously coffee or espresso! But also try with cold milk (classic for a reason), a coffee liqueur for adults, or even a bold red wine if you’re feeling fancy. Port wine is surprisingly good too.
How to Serve This 🎯
Plating Tips 🍽️
Dust with powdered sugar for elegance. Drizzle with chocolate sauce if you’re extra. A few coffee beans on top looks professional. Serve slightly warm (10 seconds in the microwave) with that ice cream I mentioned.
Keeping It Fresh 🌿
Room temperature: 3 days in an airtight container
Refrigerated: Up to 1 week (frosting stays firmer)
Frozen: 2 months wrapped individually in plastic wrap then foil
Actually, cold brownies from the fridge are amazing – the texture becomes even fudgier! Thaw frozen ones at room temperature for best results.
Pro Tips for Success 💡
Success Secrets 🔐
Room temperature ingredients blend better – take eggs out 30 minutes early. Don’t overbake – seriously, err on the side of underdone. Use quality cocoa – it makes a difference you can taste. Let them rest overnight if possible – flavors meld beautifully.
Time-Saving Hacks ⚡
Make the brownies ahead and freeze unfrosted. Whip up frosting while they thaw. Use a stand mixer for the frosting – hands-free multitasking! Pre-measure everything before starting (mise en place, baby!).
Common Issues & Fixes ⚠️
Brownies too dry? You overbaked them. Next time, check 2 minutes earlier.
Frosting too runny? Too much cream or butter’s too warm. Chill it 15 minutes.
Not fudgy enough? Could be overmixing or too much flour. Measure carefully!
Coffee flavor too strong? Reduce amounts next time, or add extra vanilla to mellow it.
Side note – if they’re slightly overbaked, brush with simple syrup mixed with coffee liqueur. Saves the day!
Common Questions 🤔
Can I double this recipe?
Absolutely! Use a 9×13 pan and add 5-8 minutes to baking time. The frosting recipe doubles perfectly too.
What if I don’t have coffee extract?
Instant coffee works great – just dissolve 1 tablespoon in 1 tablespoon hot water. Espresso powder is even better if you have it.
Will these work without frosting?
Sure, but honestly? The frosting makes them special. At minimum, dust with powdered sugar mixed with instant coffee.
Can I make these ahead for a party?
Yes! They actually taste better the next day. Make them up to 2 days ahead, store covered. Add frosting day-of if you want it looking fresh.
Is Dutch-processed cocoa necessary?
Not necessary, but it gives a smoother, less acidic chocolate flavor. Regular cocoa works fine – maybe add a pinch more sugar if using natural cocoa.
Why This Recipe Works ✅
Here’s the thing – coffee and chocolate are natural partners because coffee enhances chocolate’s complexity without overwhelming it. The combination of melted butter and eggs creates that signature fudgy texture we’re after, while just enough flour holds everything together.