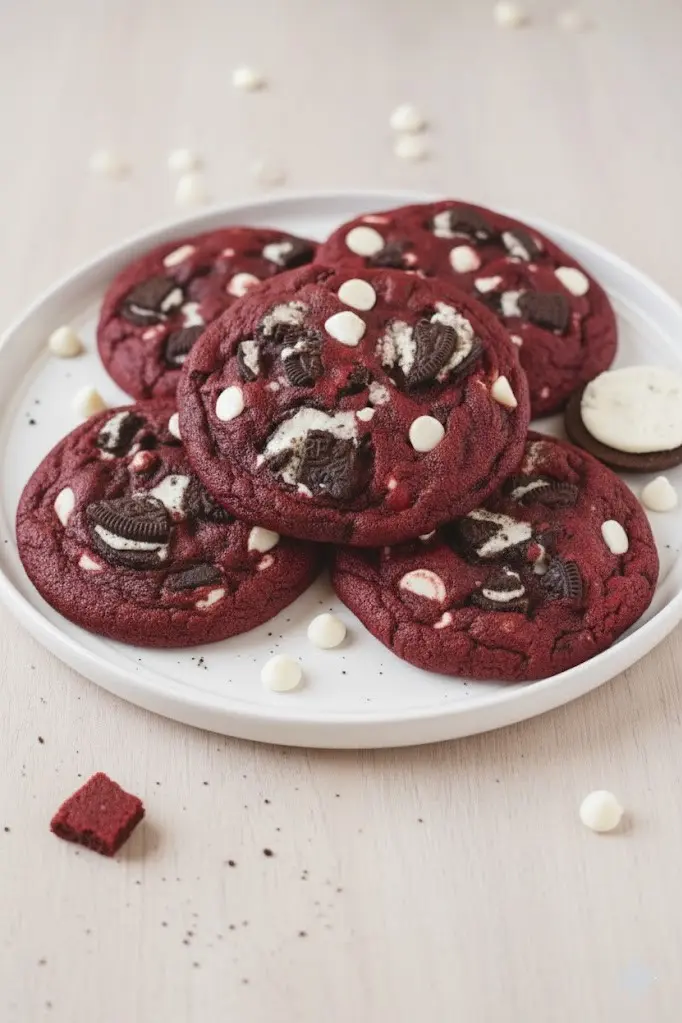
Here’s something special — Crushed Oreo Red Velvet Cookies bring together rich cocoa-kissed red velvet dough with chunks of America’s favorite cookie and sweet white chocolate chips. These bakery-style cookies are soft, chewy, and loaded with texture in every bite. Perfect for Valentine’s Day, Christmas baking, or when you’re craving something indulgent, they’re easier to make than you’d think. Let me walk you through exactly how to create these showstoppers! 🎉
What Sets This Recipe Apart 🌟
✅Incredible Flavor Depth 🌊
The cocoa powder creates that signature red velvet taste while crushed Oreos add a cookies-and-cream twist. White chocolate chips bring sweetness that balances the slight bitterness from the cocoa (trust me on this combo).
✅Bakery-Style Texture ✨
These cookies are thick, soft in the center, with slightly crispy edges. The combination of butter, both sugars, and proper chilling gives you that perfect chewy bite everyone loves.
Recipe Yield 🎯
Makes: About 36 large cookies (depending on size)
What You’ll Need 📝
Dry Ingredients:
- 4 cups all-purpose flour
- ½ cup unsweetened cocoa powder
- 1 teaspoon salt
- 2 teaspoons baking soda
- ½ teaspoon baking powder
Wet Ingredients:
- 1½ cups salted butter, softened to room temperature
- ¾ cup granulated sugar
- 1¾ cups packed brown sugar
- 3 large eggs, room temperature
- 2 teaspoons vanilla extract
- 2 bottles red food coloring (liquid not gel), about 5-6 oz total
Mix-Ins:
- 1½ cups white chocolate chips
- 22 Oreo cookies, roughly crushed (leave some chunky pieces)
Prep Time Breakdown ⏱️
Active prep: 20 minutes
Chilling time: 1-2 hours (or overnight)
Total time before baking: About 2 hours 20 minutes
Time in the Kitchen ⏰
Baking time: 11-13 minutes per batch
Cooling time: 5 minutes on pan, then 15 minutes on rack
Total time: About 3 hours (including chilling)
Let’s Get Cooking 🍳
Get Everything Ready 📋
Start by crushing your Oreos in a ziplock bag with a rolling pin — you want chunks, not dust, so don’t go crazy (some pieces should be about quarter-cookie size). Let your butter sit out for 30-45 minutes until it’s soft enough to press your finger into easily. Room temperature eggs make a huge difference in how the dough comes together, so pull those out early too.
Build the Flavor Base 🧄
In your stand mixer (or with a hand mixer), cream together that softened butter with both sugars on medium speed for about 3-4 minutes. You’re looking for it to get light and fluffy — this is where air gets incorporated. Add eggs one at a time, beating well after each addition. Pour in vanilla extract and your red food coloring. Here’s the thing: liquid food coloring works better than gel for that vibrant red color, so don’t skimp on it. Mix until everything’s combined and you’ve got that gorgeous red hue.
Bring It Together 🤝
In a separate bowl, whisk together your flour, cocoa powder, salt, baking soda, and baking powder (I always add that little bit of baking powder even though it’s not traditional — it helps with the rise). Gradually add the dry ingredients to your wet mixture on low speed, mixing just until combined. Don’t overmix or you’ll get tough cookies. Fold in the white chocolate chips and crushed Oreos with a spatula. The dough will be thick and loaded with goodies.
The Secret Chilling Step 🧊
Cover the bowl with plastic wrap and refrigerate for at least 1 hour (honestly, 2 hours or overnight is even better). This firms up the butter so cookies won’t spread too thin and intensifies the flavors. I know it’s tempting to skip this, but please don’t — it’s the difference between flat cookies and bakery-style thick ones.
Time to Bake 🔥
Preheat your oven to 350°F (175°C). Line baking sheets with parchment paper. Scoop dough into balls about 3 tablespoons each (I use a large cookie scoop). Place them 3 inches apart on the baking sheet — they spread quite a bit. Bake for 11-13 minutes. The edges should look set but the centers will still seem slightly underdone (that’s perfect). They’ll continue cooking on the pan after you remove them from the oven.
Ready to Enjoy 😋
Let cookies cool on the baking sheet for 5 minutes (this is crucial — moving them too early means broken cookies), then transfer to a wire rack. They’ll firm up as they cool but stay soft and chewy inside.
Kitchen Equipment 🏠
- Stand mixer or hand mixer
- Large mixing bowls (2)
- Whisk and rubber spatula
- Cookie scoop (3-tablespoon size recommended)
- Baking sheets
- Parchment paper
- Wire cooling rack
- Ziplock bag and rolling pin (for crushing Oreos)
The Taste Experience 😋
Flavor Journey 🎢
Your first bite hits you with chocolate-forward red velvet flavor that’s not too sweet, then the white chocolate adds creaminess while crushed Oreo pieces give you that familiar cookies-and-cream taste. It’s rich without being overwhelming.
Key Flavors & Spices 🧂
Cocoa powder provides the base chocolate flavor, vanilla extract adds warmth and depth, brown sugar gives molasses notes and chewiness, while the Oreos contribute their unique chocolate wafer and cream filling taste that everyone recognizes.
Allergy Considerations 🚨
Common Allergens 🚨
Contains: Wheat (flour), dairy (butter, white chocolate chips, Oreos), eggs, soy (in Oreos and white chocolate).
Safe Substitutions 🔄
For dairy-free, use plant-based butter and dairy-free chocolate chips plus dairy-free sandwich cookies instead of Oreos. For egg-free, try flax eggs (3 tablespoons ground flaxseed mixed with 9 tablespoons water, let sit 5 minutes) though texture will be slightly different. Gluten-free flour blends can work but results vary by brand.
Nutrition Facts 📊
Per cookie (approximate): 220 calories, 11g fat, 29g carbohydrates, 3g protein, 1g fiber, 18g sugar. These are indulgent treats, not health food, but they’re worth every calorie for special occasions!
Making It Work for You ⚙️
Diet-Friendly Options ✅
To reduce sugar slightly, you can cut the granulated sugar to ½ cup (though I wouldn’t recommend reducing more than that). For smaller portion sizes, make mini cookies using 1 tablespoon dough balls and bake for 8-9 minutes instead.
Mix It Up 🎲
Creative Changes 🎨
Swap white chocolate chips for dark chocolate or semi-sweet chips for a richer flavor. Try different cookie mix-ins like crushed Nutter Butters, Chips Ahoy, or even brownie pieces. Add ½ cup chopped pecans or walnuts for crunch. For a more intense red velvet flavor, add 1 tablespoon cream cheese to the dough (it’ll make cookies extra soft).
Seasonal Twists 🎄
At Christmas, add crushed candy canes with the Oreos. For Valentine’s Day, use pink and red M&Ms on top before baking. Halloween version? Orange food coloring instead of red, plus mini chocolate chips.
Perfect Pairings 🤝
What to Drink 🥤
Cold milk is classic (obviously), but these are amazing with hot chocolate, coffee, or even a vanilla milkshake. For adults, try them with red wine or Irish cream coffee.
Dessert Board Ideas 🍰
Serve these alongside cream cheese frosting dip, fresh strawberries, and vanilla ice cream for an epic dessert spread. They’re also incredible crumbled over ice cream sundaes.
Making It Look Great ✨
Presentation Ideas 🎨
Stack them on a white cake stand for maximum visual impact — that red color really pops. Press a few extra white chocolate chips and Oreo pieces on top of dough balls right before baking for a more “loaded” look. Dust finished cookies very lightly with powdered sugar for a snow effect (works great for winter holidays).
Perfect Garnishes 🌟
Drizzle melted white chocolate over cooled cookies in a zigzag pattern. Top with tiny red sprinkles or heart-shaped sprinkles for Valentine’s Day. A small piece of Oreo wedged into the top of each cookie before baking makes them instantly Instagram-worthy.
Keeping It Fresh 🌿
Room temperature: Store in an airtight container with parchment paper between layers for up to 5 days. They actually get better on day 2-3 as flavors meld.
Freezer storage: Freeze baked cookies in a freezer bag for up to 3 months. Thaw at room temperature for 30 minutes. You can also freeze cookie dough balls on a baking sheet, then transfer to a freezer bag — bake from frozen, adding 2-3 minutes to baking time.
Pro Tips for Success 💡
Success Secrets 🔐
Use room temperature ingredients: This ensures even mixing and better texture.
Don’t overbake: Cookies should look slightly underdone in the center when you pull them out — they’ll continue cooking on the pan. Overbaked cookies become cake-like instead of chewy.
Chill the dough: I can’t stress this enough. Warm dough = flat cookies.
Measure flour correctly: Spoon flour into your measuring cup and level it off. Scooping directly from the bag packs in too much flour, making dry cookies.
Time-Saving Hacks ⚡
Make dough the night before and refrigerate overnight — you’ll have better cookies and save time on baking day. Scoop all dough balls at once and refrigerate on baking sheets, then bake as needed throughout the week. Use a stand mixer to cut mixing time in half.
Fixing Common Mistakes 🛠️
Cookies spread too much: Your butter was probably too soft or you skipped chilling. Next time, chill dough longer and make sure oven is fully preheated.
Cookies are too cakey: Likely overbaked or too much flour was added. Remove cookies when centers still look slightly wet.
Color isn’t bright enough: You need more food coloring — don’t be shy with it. Gel won’t give you that vibrant red.
Cookies are too hard: Overbaking is the culprit. Set a timer and check at 11 minutes. Also, make sure you’re measuring flour correctly (see tips above).
Common Questions 🤔
Can I use gel food coloring instead of liquid?
You can, but you’ll need less (start with 1-2 teaspoons) and the color might not be as vibrant. Liquid gives better results for that classic red velvet look.
Do I have to use salted butter?
Salted butter is what I prefer because it adds the right amount of salt to balance the sweetness, but unsalted works too — just increase the salt to 1½ teaspoons.
What if I don’t have a stand mixer?
A hand mixer works perfectly fine! It’ll just take a bit longer to cream the butter and sugar (about 5 minutes instead of 3-4).
Can I make these without Oreos?
Sure, but then they’re just red velvet white chocolate cookies (which are still delicious). The Oreos add that signature texture and flavor that makes these special.
Will this work with regular Oreos or do I need a specific kind?
Regular Oreos are perfect. Double Stuf would work too — just use about 18 cookies instead of 22.
How do I know when cookies are done?
Edges should be set and slightly darker while centers still look soft and shiny. They’ll seem underdone but that’s exactly what you want for chewy cookies.
My Take on This Recipe 💭
Actually, these cookies have become my go-to when I need to bring something impressive to gatherings. The combination sounds a little over-the-top on paper — red velvet AND Oreos AND white chocolate — but somehow it all works together beautifully. They’re rich enough to feel indulgent but not so sweet that you can’t eat two (or three, let’s be honest). The chilling step is annoying when you want cookies 🎉🍪